How to Replace a Light Switch in Australia (Spoiler: You Can’t)
I had a bloke ring me from Hahndorf last winter at quarter past nine on a Saturday night. His wife had flicked the kitchen light switch and got a tingle through her wedding ring. He’d done the sensible thing — flipped the breaker off and called me — but he was also asking, while I was driving over, whether he should “just open it up and have a quick look” to save my callout. I told him to put the kettle on and not touch a thing. When I pulled the plate off, the active terminal was barely seated; whoever installed it ten years earlier had back-stabbed it on a Sunday arvo and left it hanging on by two strands of copper. The arc had been carbonising the inside of the wall cavity for who knows how long. Another month and that switch would have lit the kitchen on fire while they slept. So here’s the deal: replacing a light switch is illegal DIY in every Australian state. I’ll walk you through everything you ARE allowed to do — and you can hand the sparky a ten-minute job instead of an hour-long one.
What you’ll need
- A non-contact voltage tester (Fluke 1AC-A1-II or Klein NCVT-3, $40–$70 at Bunnings or a wholesaler)
- A torch — you’ll need it once the breaker’s off
- A phone with a charged camera
- The make/model of the switch you want fitted (Clipsal Iconic, HPM Excel, Legrand Excel Life — pick before the sparky arrives)
- The number of a licensed electrician with a current contractor’s licence (check the state register)
- A roll of electrical tape and a Sharpie
Step 1: Confirm the switch is actually faulty
Half the “broken switch” jobs I get are actually a blown globe, a tripped MCB, or a loose lampholder. Replace the globe with a known-good one first. Check the switchboard — has the lighting circuit MCB tripped? If the switch feels mushy, crackles when you flick it, the rocker doesn’t spring back, or you feel any heat through the cover plate, yes, it needs replacing. Take a video on your phone of the fault — sparkies love evidence and it stops you describing “a kind of fizzy noise” for ten minutes on the phone.
Step 2: Identify the circuit at the switchboard
Open your switchboard. You’ll see a row of MCBs (the small black or grey switches, usually 10A or 16A for lighting) and one or two RCDs (the bigger ones with a TEST button). The lighting circuits are usually labelled “Lights” or “L1/L2”. If your board isn’t labelled — and most pre-2000 Aussie homes aren’t — ask someone to flick the dodgy switch on and off while you watch which MCB area is warm. Or just turn each one off until the light won’t come on. Label them with a Dymo or Sharpie while you’re there. The next sparky will love you.
Step 3: Isolate the circuit and lock it out
Switch off the MCB for the lighting circuit. Don’t just flick the main safety switch — that kills the whole house and you can’t see what you’re doing. Once the MCB is off, put a strip of electrical tape over it with “DO NOT TURN ON” written in marker. Sounds dramatic. Has saved me from a kid flicking it back on while I was elbow-deep in a ceiling rose. AS/NZS 3000 calls this “isolation with positive means of preventing reconnection”. Tape and a marker counts.
Step 4: Test the switch is dead — this bit you ARE allowed to do
Hold the non-contact tester against the live side of the switch — it’ll beep or light up if there’s voltage. Now turn the MCB off. Test again. No beep = isolated. Test the tester on a known-live powerpoint first to make sure the battery isn’t flat, then re-test the switch. Two-point test, every time. I do this on jobs I’ve isolated myself. Electricity doesn’t care about your weekend plans, and it definately doesn’t care whether you “remember switching it off”.
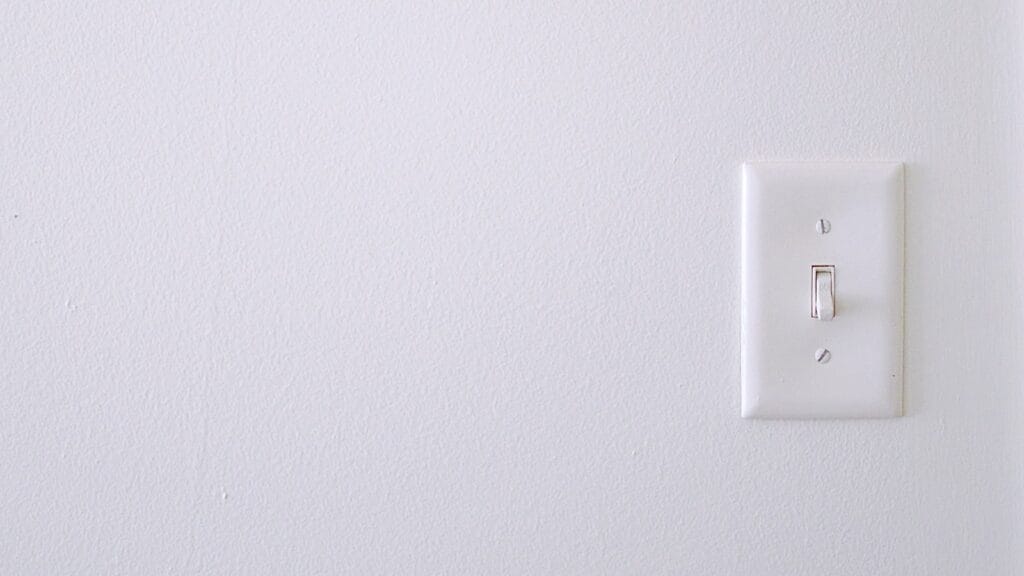
Step 5: Photograph the switch plate (cover ON)
Take a clear photo of the existing switch plate with the cover still on. Note the brand (it’ll be moulded into the plastic — Clipsal, HPM, PDL, Legrand), the number of gangs (1, 2, 3, 4), and whether it’s flush-mount on a standard wall box or an Iconic-style grid plate. Send the photo to the sparky before they quote — they’ll know exactly what mounting block to bring. This is the single biggest thing you can do to make a switch swap cheaper.
Step 6: DO NOT remove the cover plate
Here’s where Aussies get themselves in trouble. The moment you unscrew the cover plate and expose the terminals, you’ve performed electrical work — even if the power is off. The Office of the Technical Regulator in SA, ESV in VIC, NSW Fair Trading and QBCC all define “electrical work” to include altering or removing electrical equipment. Unscrewing a switch plate to “have a look” counts. Take the photo with the plate on. Walk away. I recieve at least one call a month from a homeowner who got caught up to their elbows in a wall box and didn’t know what to do next.
Step 7: Pick the replacement switch and buy it yourself
Buy the new switch yourself if you want to save money — most sparkies will mark up parts 30–50%. Go to a wholesaler (Lawrence & Hanson, MM Electrical, Middy’s) with the photo from Step 5. A standard Clipsal Iconic 1-gang switch is about $14, the equivalent HPM Excel is about $9. LED-illuminated rocker for a hallway is $35. The mounting block is sold separately, about $4 — buy that too. Dimmers: a trailing-edge LED-compatible dimmer like the Clipsal Saturn Zen is $90 and works with most modern dimmable LEDs.
Step 8: Get three quotes and check the licence
Ring three sparkies. The going rate in Adelaide right now (May 2026) for a like-for-like switch swap on an existing mounting block is $90–$140 including the call-out. Sydney and Melbourne are $120–$180. If someone quotes $50, they’re either unlicensed or planning to bill for “unforeseen extras”. Ask for their licence number and check it on the state register before they arrive. Takes 30 seconds online. SA: cbs.sa.gov.au, VIC: esv.vic.gov.au, NSW: Fair Trading, QLD: ESO.
Step 9: While the sparky’s there, get the rest of the house checked
Most sparkies will do a quick switchboard inspection while they’re already there for $30–$60 extra. Ask. Things they’ll spot in 10 minutes that you’d never know: missing RCDs on circuits that should have them (mandatory for new socket and lighting circuits since 2018 under AS/NZS 3000), undersized neutral bars, double-tapped MCBs from amateur work, signs of overheating on terminations. Black-and-white “Federal” boards from the 60s and 70s pre-date RCD protection entirely — a full board upgrade is $1,800–$3,500 and is the best safety investment in any old home. While you’re there also test smoke alarms — see how to test and replace smoke alarms.
Step 10: Get the certificate and test the new switch
When the work is done, the sparky must give you a Certificate of Electrical Safety (VIC, ACT), Certificate of Compliance for Electrical Work (NSW), or the equivalent for your state. Keep it with your house papers. If you ever sell or claim insurance after a fire, this document proves the work was legal. No certificate, no payment. Once the MCB is back on, flick the new switch a few times — should feel crisp. Run the non-contact tester over the cover plate to confirm no voltage leakage. Done.
When to call a tradie
All of this — every step that involves removing the cover plate, touching a terminal, or replacing the switch — is licensed-only work in Australia. Plug-in stays DIY, hard-wired stays sparky. If you’ve got aluminium wiring (1960s–70s Aussie homes), pre-1990 cloth-insulated cables, or switches in plaster walls with no accessible cavity above, ALL of those bump labour cost and need a contractor who knows what they’re doing. Ask before the quote, not after. And if the fault is in the switchboard itself — buzzing, browning, hot — that’s not a switch problem, that’s an urgent call.
Common screw-ups
- Pulling the cover plate “just to look” — instantly illegal work, voids insurance.
- Assuming the power is off because the switch is off — switches can be wired on the neutral in older homes.
- Buying a fancy smart switch without checking the dimmer wiring requirements — most need a neutral at the switch, which older lighting circuits don’t have.
- Hiring an unlicensed mate to do it “cheap” — voids insurance, illegal, fines start at $4,000 in SA.
- Forgetting to ask for the certificate — without it, the work is unprovable.
Cost & time
Like-for-like switch swap: $90–$140 in Adelaide, $120–$180 in Sydney/Melbourne. Adding a new switch position: $250–$450. Dimmer install where wiring supports it: $180 plus the dimmer. The whole job takes a sparky 15–30 minutes if you’ve done the prep right. Your prep — photo, isolation, parts purchase — takes about 20 minutes total.
Here’s the safe play: if it’s on the active side of the meter, it’s not yours. The law isn’t there because politicians hate DIY — it’s there because every dead-electrician statistic in this country traces back to a “she’ll be right” job done by someone who didn’t know what a back-stab terminal does when it’s three-quarters seated. The $90 you pay me is for the bit you legally can’t do. The other 90% of the job — diagnosis, isolation, choosing parts, paperwork — you can absolutely do yourself, and it’ll halve my bill. Get the photo, get the part, get the licence number. Easy.