How to Assemble a Trampoline (Vuly / Springfree style)
Right, here’s the thing about trampoline assembly. My eldest got onto me last summer to put together a Springfree S132 for the grandkids over at his place in Charlestown. I’d built two before — one for him about 12 years back, one for a mate in Maitland a few years after. Both times I followed the instruction manual to the letter and both times it took me the better part of four hours, with me cursing the springs at hour three because the mat had gone lopsided and the last 10 springs felt like they’d been welded shut. This time I reckoned, no, we’re doing it my way. Springs before net poles. Two hours flat, mat tensioned even all the way round, no swearing in front of the four-year-old. That’s the article.
The instruction manual gets the order wrong, mate. They have you fitting the safety net poles before the mat is tensioned, which means every single spring you stretch onto the frame is fighting against poles that are already bolted to that frame, racking it sideways. Reverse those two steps and the whole job falls into place. I’ll walk you through how I do it, plus the Aussie-specific bits (anchor kits in cyclone zones, the Buffalo grass problem, never a steel hammer on the powder coat). Listen mate, this’ll save you a sore back.
What you’ll need
- The trampoline kit (Vuly, Springfree, or similar)
- A second adult — full stop, this is a two-person job
- A 13 mm and 17 mm spanner or socket set
- A rubber mallet (Bunnings, $18) — never a steel hammer on the frame
- A cordless drill with Phillips bit (Ozito or Ryobi fine)
- The supplied anchor kit — check it’s in the box before you start
- A spirit level and a tape measure
- Optional: knee pads, you’ll be on the ground alot
Step 1: Pick the site — flat, drained, 1.5 m clear all around
Pick the site before you open the box. Trampolines need flat ground (within 50 mm across the diameter), proper drainage (don’t site them in a low spot that pools), and 1.5 m clearance to fences, trees, and Colorbond walls. Branches above need to go — 5 m vertical clearance from the mat surface is the AS 4989 spec, and a low branch on a windy day is how you put a kid’s eye out.
Quick tip from my old man: avoid Buffalo grass. The trampoline shades the lawn underneath and Buffalo dies inside two months. Couch tolerates the shading better.
Step 2: Sort all parts before opening any bag
Lay everything out on the lawn. Frame tubes (legs, top ring sections), springs, mat, safety pad, net poles, net, anchor kit, hardware bags. Count against the parts list. Twenty minutes of sorting saves an hour of “where’s that bolt gone” later, fair dinkum.
Vuly kits are particularly good at labelling parts (A1, A2, B1). Springfree uses colour-coded zip ties. Either way, don’t open hardware bags until you need them, and lay each component on the bag it came in. That’ll keep the dog from running off with the spreader bolts too.
Step 3: Build the top ring flat on the ground first
The top ring is the round frame the springs attach to. Connect the curved tubes into a complete ring on flat ground. Snug-fit only — don’t fully tighten any bolt yet. You need wiggle room when the legs go on.
Use the rubber mallet to seat tubes that don’t fully push together by hand. Never a steel hammer. The powder coating dimples, rust starts at the dimple, and in six months you’ve got orange streaks running down the frame. The trampoline manufacturers cop blame for “rusting” frames that were actually beaten with the wrong hammer by the assembler.
Step 4: Attach legs while the ring is flat
Each leg has two attachment points to the top ring (W-shaped legs on Vuly, U-shaped on Springfree). Bolt them on but again, only snug-tight. With all legs attached and the ring still flat, you’ll have a wide low frame sitting there like a giant metal donut.
Step 5: Stand the frame upright — two-person flip
Two adults, one each side, lift and flip the whole frame onto its legs. Awkward but not heavy (35-50 kg). Once on its legs, walk around and check each leg sits flat on the ground. If your lawn dips at any one leg, shim with a timber offcut — don’t try to compress the leg down, you’ll bend it.
Now go back and fully tighten every frame bolt — top ring joints first, then leg-to-ring bolts. This is where you commit.
Step 6: Fit the mat — opposite-spring-pair method
The mat goes on next, BEFORE the net poles. This is where my order differs from the manual and where 90% of the wrestling-with-the-last-spring frustration comes from. With the net poles still off the frame, you have full overhead access to stretch springs without something poking you in the back of the head.
Springs go on in opposite pairs, never sequentially. Put one spring at 12 o’clock, then 6 o’clock (opposite), then 3 o’clock, then 9 o’clock, then halfway between each, and so on. Keeps the mat tension balanced. Sequential one-after-the-next will pull the mat sideways and the last 10 springs will be impossible to stretch on. I’ve seen people give up on the last 6 springs and convince themselves “she’ll be right” — she’s not. An unfinished spring ring runs the rest of the springs to failure inside a year.
Use the spring puller tool from the kit. Don’t use a screwdriver — you’ll bend the spring and slip and skewer your hand. Ask me how I know.
Step 7: Now fit the net poles — after the mat is tensioned
This is the order reversal. With the mat fully tensioned, the top ring is now stiff and dimensionally stable. Net poles bolt to the frame brackets without flexing the ring. If you’d fitted the net poles first, every spring you stretch would tug the ring and bend the poles. Reverse the order and the poles slide on like they were made for it. Easy as.
Step 8: Fit the safety pad and net
Safety pad is the foam/PVC ring that covers the springs. Velcro or tie straps to the frame — colour-coded on Springfree, numbered on Vuly. The pad has a top side (logo) and an underside (drainage holes). Don’t put it on upside-down or rainwater pools and rots the foam in 18 months.
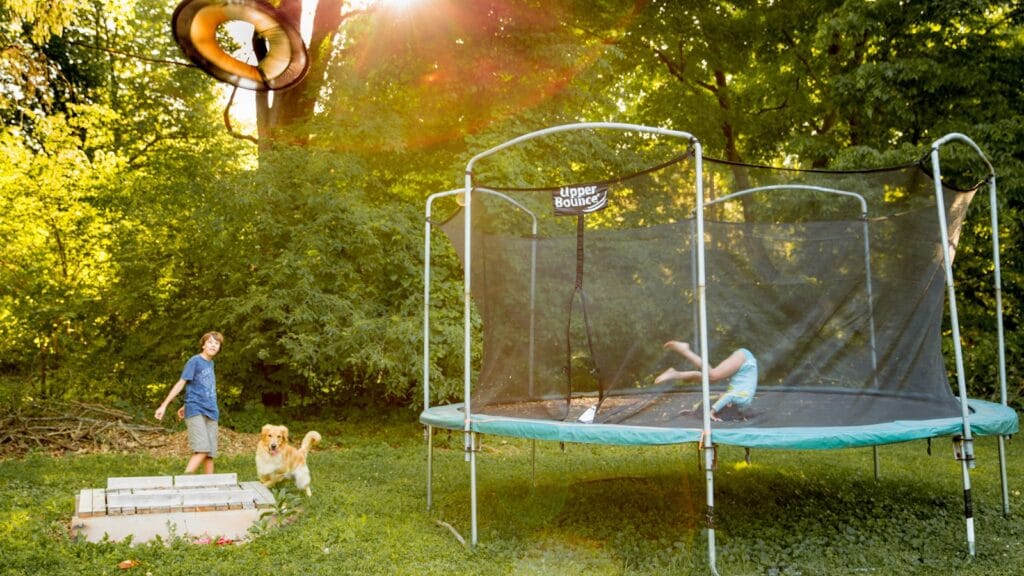
The net hangs from the top of the net poles down to the mat edge. Most modern systems use a spring-loaded toggle at each pole — feed the net loop on, spring snaps closed. If your kit didn’t include a net (some bargain Bunnings imports), don’t let the kids on. The closed net is what keeps them landing on the mat instead of the concrete path.
Step 9: Install the anchor kit (mandatory in cyclone zones)
The anchor kit is four corkscrew ground stakes plus four ratchet straps. Screw the stakes 300 mm into the ground at each leg position (or every second leg on a hexagonal frame). Connect the strap from the leg base to the stake top, ratchet tight enough that the strap is taut without lifting the leg.
In Brisbane, Sunshine Coast, anywhere north of Bundaberg — the anchor kit is non-negotiable under AS 4989. Even south of the cyclone zone, I’d still anchor. A 90 km/h southerly through Newcastle isn’t unheard of, and a 30 kg airborne trampoline heading for next door’s Colorbond fence is an insurance claim, a fence repair, and probably a coronial inquest rolled into one. Don’t be that bloke.
Step 10: Test bounce and lock-off the entry zip
Before letting kids on, do a 5-minute adult bounce test (gently — your knees aren’t 12 anymore). Listen for any creaks, watch any frame flex, check no bolts have backed off. Re-tighten anything that’s moved. Springfree has a magnetic safety net door, Vuly has a zip — show the kids how to close it properly and make the closed-net rule ironclad. Most trampoline injuries happen at the unzipped opening, not on the mat. While you’ve got the spanner out, it’s a good time to check the bolts on the garden shed too — same maintenance check.
When to call a tradie
You generally don’t need a pro for trampoline assembly — the kits are designed for two adults with basic tools. Where I’d get help: cyclone-zone anchoring in rocky ground that won’t take corkscrew stakes (you’ll need a landscaper with a hammer drill and concrete-set anchor points), or any setup on a sloped block where the trampoline needs a levelled pad. Concreters can pour a 4 m circular pad with anchor bolts cast in for about $400-600 and it’ll outlast three trampolines.
Common screw-ups
- Springs on sequentially. The last 10 are impossible. Always opposite pairs.
- Net poles before the mat. You’ll fight the poles for every spring and end up with a racked frame.
- Steel hammer on the powder coating. Rust streaks within 6 months, definately.
- Safety pad fitted upside-down. Water pools, foam rots inside 18 months.
- Skipping the anchor kit. Wind picks the trampoline up and your insurance won’t cover what it lands on.
Cost & time
Vuly Lift Pro and Springfree S132 sit in the $1,200-$2,000 range depending on size. Add $80 for a proper rubber mallet, spanner set if you don’t own one, and a spirit level. Assembly time: 2 hours with two adults if you follow my order; 4+ hours if you follow the manual. Kit lasts 8-10 years if anchored and serviced.
The Mick wrap
Springs before poles, anchors mandatory north of Bundaberg, never use a steel hammer. The instruction manual is a guideline, not a rulebook — the order they specify costs you two extra hours and a sore back. My grandson is on year 2 of the Springfree we built last summer and the kit’ll outlast the kids’ interest in it. If you’re doing other outdoor builds this weekend, the rules around outdoor furniture assembly and a proper BBQ build use the same opposite-pairs tightening trick. Worth a read before you crack the next flatpack.


