How to Paint Trim and Skirting Boards Cleanly
I’ve done a few of these now, and trim is the bit that separates a “we painted the lounge” job from one that looks bought-in. The walls are the easy part — broad strokes, forgiving surfaces. The trim — skirtings, architraves, door frames, window sills — is where messy paint lines, drips and dust bumps show themselves at every glance. I once did a job in a Carlton terrace where the owner had painted the walls in a weekend, and the wall coat looked great. Then she walked me to the skirting, which she’d done in oil enamel with a half-loaded brush, and it looked like a teenager had iced a birthday cake. We sanded it back, started over, and she said afterward that the trim made the walls look better even though we hadn’t touched them. That’s the truth of trim — 20% of the area, 80% of the visual quality.
The technique below is what we use across Melbourne renovations every week. It’s slower than you’d hope but the result lasts ten years and looks professional. Heres where most people go wrong: they rush the trim because they’re tired from the walls. Dont. Save energy for it.
What you’ll need
- 2L premium gloss or semi-gloss enamel — Dulux Aquanamel or Taubmans Tradex Trim are my picks. Water-based enamel for almost every job; oil-based gives a harder finish but takes a day to dry between coats and yellows in 18 months.
- A 50 mm angled cutting-in brush — Purdy is the benchmark, around $35. A $35 brush will outlast ten cheap ones, and the angle holds its shape.
- A 25 mm sash brush for tight spots and architrave reveals
- Frog Tape Yellow multi-surface (the delicate one — won’t lift fresh wall paint)
- 120 and 240 grit sandpaper plus a small sanding block
- Sugar soap or methylated spirits
- Wood filler — Selleys Knead-It Timber or Plastibond — for nail holes and dings
- A canvas drop sheet (never plastic — plastic dries paint into a slip hazard)
Step 1: Wash trim with sugar soap or metho

Trim collects more skin oils, kitchen grease and dust than walls do. Think about it — your hand brushes the architrave every time you walk through a door, the skirting collects floor dust and shoe scuff, the window sill gets sun-baked grime. Wipe every linear metre of skirting and architrave with sugar soap on a microfibre, or methylated spirits on a clean rag for the really greasy bits. Water-based enamel doesnt bond to grime — a clean surface is the difference between paint that lasts ten years and paint that flakes in two. Trust me on this. Toby (my kelpie) drags his paws across our skirting at home and even those need a wash before any recoat.
Step 2: Fill nail holes and dents
Wood filler into any nail holes, gouges, hairline cracks, and the dings where the vacuum has clouted the skirting over the years. Press it in firmly with a putty knife, level off proud of the surface so you can sand flush. Let it dry per the can — usually 30 minutes for Selleys Rapid. Don’t underfill; a hollow shows in gloss enamel like a beacon.
Step 3: Sand all trim with 240 grit
Light hand-sanding all over, even on previously-painted trim that looks fine. This dulls the existing paint so the new coat bonds chemically, and it knocks down any high spots from filler. Your not stripping paint — your scuffing it. Sandpaper folded into quarters fits the profile of a Federation skirting nicely; for cove and ogee profiles use a sanding sponge instead. Two minutes per metre is about right.
Step 4: Vacuum and tack-cloth the trim
Vacuum the dust off, then wipe with a slightly damp microfibre. Any dust left on the surface ends up in your enamel as visible bumps — especially with gloss, which photographs every flaw. A proper tack cloth from the paint shop is $4 and worth it for a high-end job. For everyday work the damp microfibre is fine. The bottom of skirtings is where dust hides — get the vacuum nozzle right in along the top of the floor.
Step 5: Tape — but tape onto the wall, not onto the floor
Frog Tape Yellow along the wall side of the skirting, pressed firmly with a putty knife. The paint goes over the tape edge a couple of millimetres — that’s intentional, the tape catches it. Don’t tape the floor side — you’ll cut that line by hand or accept the floor catching a tiny edge of enamel that wipes off with a damp rag the next day. For more on freehand cutting against walls, see our cut-in paint edges guide — same skill, applied upside down for skirting.
Step 6: Cut in along the wall edge first
Load the angled brush properly — one third of the bristle into paint, tap (not wipe) on the kettle edge. Long smooth confident strokes along the top edge of the skirting where it meets the wall. Slow down at corners. Don’t dab — drag. The angled brush wants to lay paint on a flat plane; trust it. Cut a 30 cm section and check your line before doing the next one. If your hand wants to wobble, your loading too much paint — beat the brush off harder.
Step 7: Fill in the body of the trim with the same brush
For skirtings, two horizontal passes along the top and bottom, then a horizontal pass along the middle. Always finish in the long direction (with the grain of the timber, parallel to the floor). For architraves, do the long sides first, then the short top piece. The “wet edge” rule applies on trim too — don’t let one section dry before you blend the next, or you’ll see a brush-mark join in raking light forever. If you have to stop, stop at a corner or a join in the trim, never mid-rail.
Step 8: Pull tape while paint is just-tacky, not dry
Same rule as walls — tape pulled while paint is dry rips paint off with it; tape pulled while paint is fully wet smears the line. Just-tacky is the sweet spot, usually 20–40 minutes after rolling. Pull slowly at a 45° angle, away from the freshly painted surface and back on itself. Lovely finish.
Step 9: Wait the recoat time, then second coat
Read the can — water-based enamels are usually 2 hours at 25°C; oil-based are overnight. Patience matters more on trim than on walls because trim is high-glare, and any lifting of the first coat by a too-soon second coat shows forever. Cut in, fill, smooth. Trim takes two thin coats every time — never one heavy coat. Heavy coats run, sag, and orange-peel.
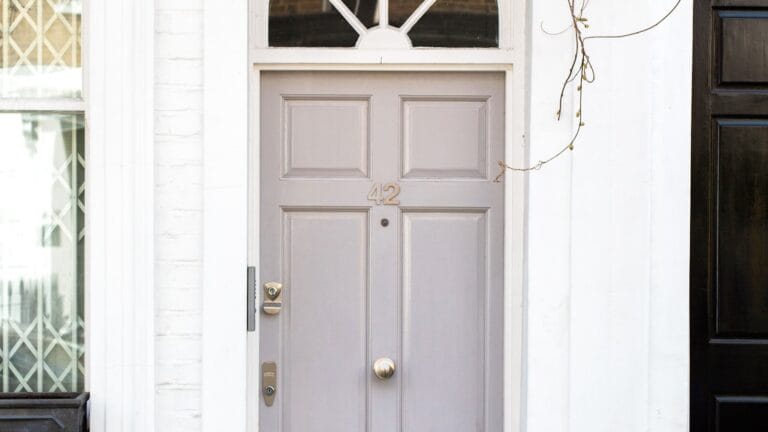
Step 10: Door edges last, with the door open
Doors get painted with the door open and the hinges visible. Three sides of the door (top, latch side, hinge side) get a thin coat of enamel — the bottom and the inside of the hinge edge can stay un-touched if they’re already covered. Don’t shut the door until the paint is fully dry, which is overnight for water-based enamel and 48 hours for oil. Wet enamel sticks to itself like glue, and a door painted shut needs a Stanley knife to separate. I’ve seen it. For the full front door technique including UV-stable enamel and stripping, see our paint front door timber guide.
When to call a tradie
Most trim work is straightforward DIY. But there are situations where the prep is beyond a weekend painter. If the existing paint is pre-1970 and visibly flaking — that’s potentially lead paint, and sanding it without proper PPE and containment is a real health risk, especially with kids in the house. Get a lead test swab from Bunnings ($15) and if positive, call a professional with the right kit. Same goes for any architrave or skirting attached to fibre-cement or asbestos sheet (common in 1950s–80s Aussie homes) — never sand it, ever, regardless of what you read online. And if your trim is showing daylight gaps from major timber movement or a wall settlement crack — fix the structural issue first; paint won’t bridge a moving join. AS 2311 is the painting-of-buildings standard we work to.
Common screw-ups
- Skipping the wash and metho. Skin oil and grease will lift enamel off in sheets. Two minutes per metre saves the redo.
- One heavy coat. Runs, sags, orange-peel, and 48-hour cure. Two thin always beats one thick.
- Painting the door shut. Sticks. Stay open until overnight dry.
- Pulling tape too late. Peels paint with it. Just-tacky, 45°, slow.
- Cheap brush. Fluff in the paint, lost bristles in the finish. A $35 Purdy outlasts ten cheapies.
Cost & time
Budget $90–$160 for a full room of trim (2L Aquanamel, brushes, tape, filler, sandpaper). A decent 4 m × 4 m room with standard skirtings, architraves around two doors and a window sill is a full day’s work for two coats — about 7–8 hours, much of it the recoat wait. Don’t try to bash it out in an afternoon — trim is where the patience pays off.
The Jen rule — wrap
Trim is 20% of the area and 80% of the visual quality. If your short on time and you can only do one coat on walls but two coats on trim, do that — the trim is what people notice when they walk in. Two thin coats of enamel beats one heavy coat every single time, and the prep is what makes the enamel sit beautifully. Get the brush right, get the sand right, get the timing right on the tape pull, and your trim will outlast the carpet under it. Doing something tricky — period mouldings, painting over varnish, deep-stained Tasmanian Oak that wont take acrylic? Send us a write-up. Theres almost always a way to make it work without a full strip — your just careful with the primer choice.