How to Patch a Plasterboard Hole Larger Than 100 mm
Door handle hole behind the door. Kid’s foot through the wall. Removalist’s trolley wing. Whatever did it, anything bigger than a fist (about 100 mm) needs more than a tube of Polyfilla. You need a backing plate and a fresh piece of plasterboard cut in. I had a job last spring in Adamstown — single mum, three teenage boys, a hallway wall that looked like a Swiss cheese, six holes ranging from 80 mm to 350 mm. Did the lot in a weekend, three coats of compound, blended invisibly. She got the bond back on the rental and the boys got a stern lecture.
Right, here’s the thing. Most blogs teach the timber-batten method — screw a couple of timber off-cuts behind the hole, screw a new piece of Gyprock to them. That works but it’s slow and the joints telegraph through paint forever. The pro method is the “California patch” — a piece of new plasterboard cut bigger than the hole, with the gypsum bevelled away from the back to leave a paper flange that gets bedded into joint compound. No timber, no extra screws, faster, joints paper-thin instead of butted. Feels weird first time. Do one and you’ll never go back. Plus the Aussie gotcha that’s bitten me three times: Aussie Gyprock is 10 mm standard. US drywall is 12.7 mm (half-inch). Grab an offcut from a US-sourced project and the patch sits proud. Cut the patch from the same sheet thickness, every time. Bunnings sells 10 mm CSR Gyprock board in 1200×900 quarter-sheets under $20.
What you’ll need
- Offcut of 10 mm Gyprock, slightly bigger than the hole
- Stanley knife with sharp blade
- Steel ruler or straight edge
- Pencil
- Mesh joint tape (50 mm wide) — backup only
- Joint compound — Boral Cornice Cement for first coat, USG Easy Sand or Gyprock CSR Total Joint Cement for finishing
- 100 mm and 200 mm taping knives
- Hawk or mud pan
- 180 grit and 220 grit sanding sponge
- Drop sheet, masking tape
- P2 dust mask — gypsum dust is no joke
Step 1: Square up the hole
Resist the urge to leave the hole as-is. Cut it into a clean rectangle with the Stanley knife, lining edges up with a steel ruler. Rectangle is far easier to patch than a jagged shape. If there’s loose Gyprock paper hanging, trim it. Any crumbled gypsum at the edges, score and snap clean. Why square? Because a clean rectangle has four straight reference edges. A starburst hole has 17 reference edges and every one is a place the patch can fail. For smaller holes under fist-size, you don’t need the full California patch — see patching a small plasterboard hole for the mesh-and-compound method instead.
Exception: if the hole already exposes a stud, square it so one edge runs centred on the stud (so you can screw the patch direct to the stud). That’s a “stud patch,” easier than California — skip to Step 6.
Step 2: Cut the patch piece bigger than the hole
Measure the squared-up hole. Cut a piece of 10 mm Gyprock 50 mm wider on every side. A 150×150 mm hole gets a 250×250 mm patch piece. Pencil-mark the back of the patch with a square the size of the hole, centred. That square is what stays. The 50 mm border around the square becomes the paper flange. Trust me, the 50 mm border is non-negotiable — go smaller and the flange tears off when you bed it. Go bigger and you’re wasting compound.
Step 3: Bevel the back gypsum away — keep the paper
This is the California-patch magic. With the Stanley knife, score around the inside square (through the back paper, into the gypsum, but don’t cut through the front paper). Snap the gypsum away from the back — breaks along your scoreline. Carefully strip the gypsum off the 50 mm border, leaving the front paper in place. You now have a piece of Gyprock with a square gypsum block in the middle and a paper flange around it. Block fits the hole; flange sits on the wall around the hole. First time you do this it feels backwards. Do it once and you’ll see why it works.
Step 4: Test-fit and trim
Push the gypsum block into the hole. Flange should sit flat on the wall surface around the hole. If it doesn’t sit flush, the block is too big — trim with the knife. If the block falls through, too small and you need a new patch (or commit to mesh-tape backup). Once it sits cleanly, mark which way is up — orientation matters when you put it back in. If you’re working through a renovation alot and have offcuts everywhere, label them by thickness — saves a Bunnings trip.
Step 5: Bed the patch into joint compound
Apply a 100 mm wide ring of joint compound around the hole, on the wall, where the flange will sit. About 2 mm thick. Press the patch in — block into the hole, flange beds into the compound. With the 100 mm taping knife, smooth the flange into the compound, squeezing excess out the edges. Flange should be invisible under a thin layer of compound, paper-tight to the wall. Let dry overnight. Don’t speed-coat this — Boral Cornice Cement sets hard but takes 12+ hours to fully harden in cool weather. Patience wins.
Step 6: For stud patches, screw it down first
If the patch lands on a stud, screw the patch to the stud with Gyprock screws (32 mm, fine thread for timber, coarse for steel) at 200 mm centres. Set screw heads just below the surface. Tape and compound the joints with mesh tape and joint compound, two coats, feathered. If you’re not sure where the stud sits behind your patch, the cross-sweep method in using a stud finder properly applies here as well — magnet check confirms the screw line.
Step 7: First fill coat over the patch
Once the bedding coat is dry, apply a wider coat (200 mm wide) of joint compound over the entire patch and out onto the wall. Feather the edges by pressing harder on the outer edge of the knife — compound thicker in the centre, almost zero at the edges. Don’t try to get a perfect finish on this coat. Bumps, ridges, minor lines are fine. They sand or get covered by the next coat. Listen mate, this is the coat where blokes get frustrated and try to do too much. Don’t. It’s a build-up game, not a one-shot.
Step 8: Sand, second fill, sand, third fill
Once dry (overnight), sand with 180 grit. Knock down the obvious bumps. Don’t sand into the paper face of the wall around the patch — that’s the killer. Go through the paper and you’ve got a bigger problem than you started with. Apply a second coat, 300 mm wide, feathered further. Dry, sand, third coat 400 mm wide, feathered to nothing. Three coats is standard for an invisible patch. Two coats works in a wardrobe; three is bedroom-wall standard; four is feature-wall standard. If the hole was from a doorknob bashing through, fix the cause too — a door stop installed properly stops the next hole. Same principle as fixing a sticking interior door: address the underlying problem, not just the symptom.
Step 9: Final sand with 220 grit, dust off
After the last coat, sand with 220 grit using a sanding sponge — sponge follows contours better than a flat block and avoids over-sanding the edges. Run your hand over the patch with eyes closed. If you can feel the patch boundary, it’s not done. Whole area should feel like a single flat surface. Vacuum the wall. Wipe with a damp microfibre. Let dry. Wear the P2 mask the whole time — gypsum dust gets in your sinuses and you’ll be coughing for a week.
Step 10: Prime, paint, and texture-match if needed
Fresh joint compound is more porous than the surrounding paint. Prime with a sealer-undercoat (Dulux 1 Step Acrylic Prep & Prime, or Taubmans 3 in 1 Prep). Top-coat with the wall colour — and paint the entire wall corner-to-corner, not just the patch, or you’ll see a “halo” where new paint sheen differs from old. Homeowners forget this constantly. If existing paint is over 5 years old, even the right tin from the same batch won’t match — UV has shifted the colour. Paint the whole wall. If the wall has a subtle texture, thin the joint compound, load a stipple roller (Bunnings, $12), roll over the patch area in a random pattern. Or use Selleys EZE Plaster Texture aerosol. Test on cardboard first.
When to call a tradie
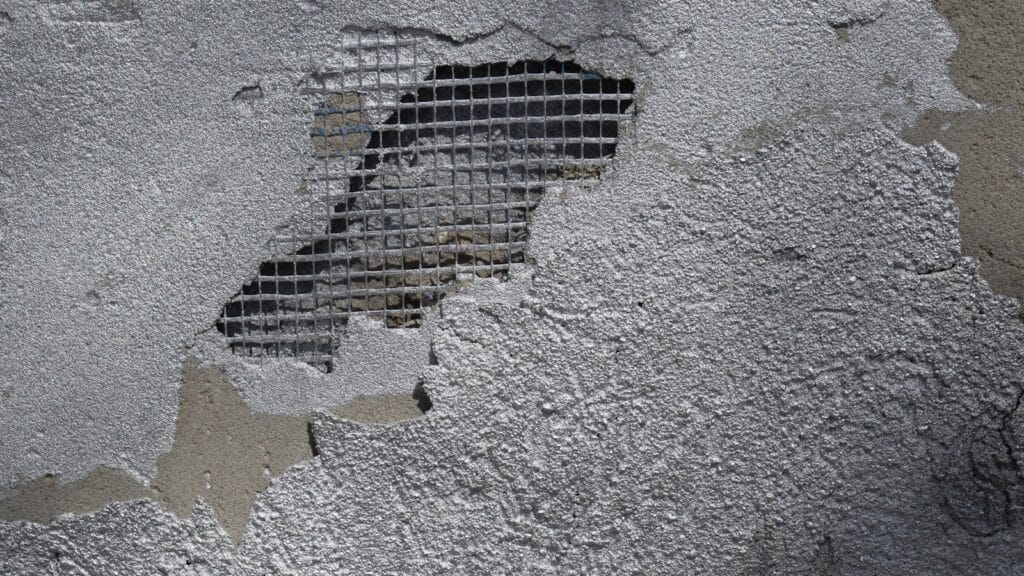
If the hole came from water damage — burst pipe, leaking shower, roof leak — the cause has to be fixed first by a plumber or roofer AND the surrounding plasterboard checked for moisture before you patch. Wet Gyprock sealed inside paint grows mould between paper layers; won’t show for two years, then a brown stain appears that no paint covers. Use a moisture meter (Bunnings hires Tramex). Anything over 1% on the relative scale needs to dry out before patching. Also call a plasterer for holes over 500 mm — at that size, you’re effectively re-sheeting a section of wall, and the structural attachment back to studs is critical.
Common screw-ups
- Wrong Gyprock thickness. US 12.7 mm patch in Aussie 10 mm wall sits proud forever. Match thickness.
- Skipping the bevel. A flat-cut patch needs timber backing and the joint telegraphs through paint.
- Sanding too aggressive. Goes through the paper face, paper edges curl, new crater. Use light pressure.
- Painting only the patch. Sheen halo visible under raking light. Paint the whole wall.
- Patching over moisture. Mould between the paper layers. Always dry the wall first.
Cost & time
Quarter-sheet of 10 mm Gyprock $18-22 (does multiple patches), joint compound 7 kg bucket $30-40, taping knives $15-25, sanding sponges $5 each. Time: 20 minutes prep and patch on day 1, 15 minutes per fill coat on days 2-4, an hour for prime and paint on day 5. Most of the time is waiting for compound to dry. Active labour: about 2 hours total.
The Mick wrap
The Mick rule for plasterboard patches over 100 mm: match the thickness, bevel the back, three coats minimum. 10 mm patch into 10 mm wall, paper flange instead of timber battens, three feathered coats of joint compound. Get those three things right and the patch will be invisible under paint and outlive the rest of the wall. Skip any of them and you’ll see the patch outline in raking light forever. Fair dinkum, the California patch is the single best technique I learned in my first decade on the tools — and most homeowners have never heard of it. Now you have.