The Starter Handyman Tool Kit: 12 Tools Worth Buying First
Right, here’s the thing. My mate Dave bought his first house in Maryland a couple of years back. Walked into a big-box hardware store on settlement weekend and walked out with a 200-piece “complete homeowner tool kit” in a fancy plastic case for $299. Made him feel like a tradie for about three days. Six months later he rang me because none of it would loosen a tap fitting, the screwdriver bits were rounding out, the hammer head was loose on the handle, and the “professional” pliers had snapped in half. He’d actually used about 12 of the 200 pieces. The rest is sitting in his garage gathering dust to this day.
“What tools should I buy first?” is the question I get asked at parties, at the pub, and by relatives who’ve just bought their first house. The hardware shops will happily sell you a 200-piece set — and 80% of it will sit unused for the next 20 years. The real handyman starter kit is about 12 tools that earn their keep on the first weekend and last decades. This is what I’d buy if I was starting from scratch in an Aussie home today, 25 years into the trade.
Why the cheap mega-set is a trap
The big sets pad out the count with stuff you’ll never use — sockets that don’t fit anything Australian, a hundred screwdriver bits where you only need ten, plastic pliers that bend on the first tough job. Better to buy ten good tools than a hundred bad ones. Every tool below is something I use weekly, sometimes daily.
What you’ll need (the actual list)

- A cordless drill/driver
- A 5m tape measure
- A 60cm spirit level
- A claw hammer (450g)
- A set of screwdrivers (Phillips and flat, 3 sizes each)
- A utility knife with replaceable blades
- Multi-grip pliers (Channellock-style)
- A stud finder
- An adjustable spanner (250mm)
- A handsaw — 550mm with hardpoint teeth
- A digital multimeter
- A torch and headlamp with USB charging
Step 1: A cordless drill/driver — the single most valuable tool in any house
Pick a 12V or 18V drill from a brand whose battery system you’ll stick with (Makita, Ryobi, DeWalt, Milwaukee, Bosch). Skip the cheap supermarket no-name drills — the chuck wears out, the battery dies inside two years, and you’ll buy a real one anyway. Budget around $200 for a good kit including two batteries and a charger. Ozito is the budget pick if you can’t stretch to Makita — works fine for occasional use.
With a drill you can hang shelves, build flat-pack, drive screws into hardwood, drill plastic, even stir paint. Pair it with our choose and use a cordless drill guide which covers chuck sizes, speeds and bit selection in detail.
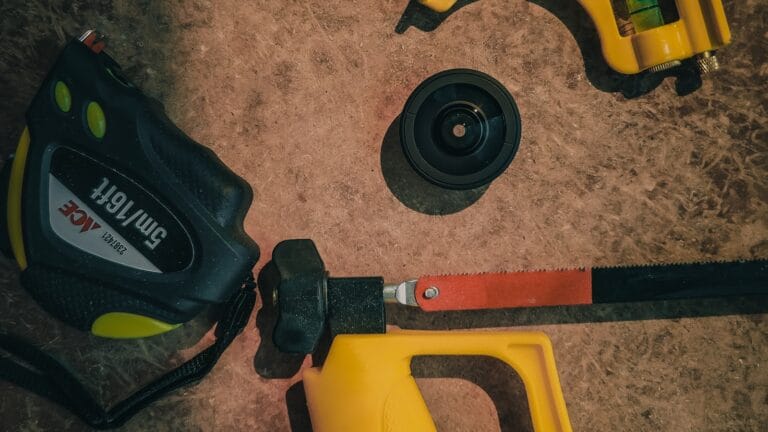
Step 2: A 5m tape measure
Stanley FatMax, Lufkin, or any quality 5m. Cheap tape measures’ blades buckle on long pulls and the blade lockup wears out after a few hundred pulls. A real tape measure lasts a lifetime — I’ve still got my dad’s old Stanley from the 80s and it works fine. 5m covers every domestic measurement; you don’t need 8m unless you’re doing fences and decks.
Step 3: A 60cm spirit level
For shelves, pictures, doors, anything that needs to be horizontal or vertical. 60cm is the right size — small levels lie because you can fit them across a high spot in the wall. Get one with a vial at both ends so it reads horizontal and vertical. Bahco, Stabila if you’ve got the budget, or any solid Bunnings own-brand.
Step 4: A claw hammer (450g / 16oz)
One hammer is enough for 90% of house jobs. Estwing if you can stretch the budget ($65), Stanley if not ($30). 450g is the sweet spot — heavy enough to drive nails, light enough to use one-handed for an hour without your wrist going out. Steel-shafted hammers transmit more vibration to your wrist; fibreglass or rubber-handled is kinder to your joints, which, mate, in 25 years on the tools I can tell you matters.
Step 5: A set of screwdrivers (Phillips and flat in 3 sizes each)
Six screwdrivers cover 99% of jobs: PH1, PH2, PH3, and three flatheads in small/medium/large. Avoid the cheap “100 bits” sets — they’ll round out screw heads and you’ll spend an hour with a drilled-out fastener. Buy actual screwdrivers, not bits, for hand work. Stanley FatMax or Wera if you want to feel posh.
Step 6: A utility knife with replaceable blades
For opening boxes, cutting plasterboard, scoring, cutting carpet, and a hundred other tasks. Stanley or Olfa retractable. Spare blades — buy a 100-pack from Bunnings, you’ll use them all. Don’t be that bloke who’s using a snapped blade because it’s still kinda sharp — a fresh blade is safer because it doesn’t slip.
Step 7: Multi-grip pliers (Channellock-style)
Adjustable jaws for plumbing, gripping awkward shapes, and removing stripped screws. Channellock or Knipex if budget allows; Stanley if not. 250mm is a good general size. The cheap ones bend at the pivot under serious load — buy once, cry once, as the apprentices say.
Step 8: A stud finder
$25 electronic stud finder. Magnetic ones work too but require slow sweeping. Bunnings’ own brand is fine for occasional use; if you’re hanging things weekly, spend $80 on a Zircon. Without one, every TV mount and shelf install is a guess — and that means trying three different anchor positions before you find the stud, which means three holes to patch. Our use a stud finder properly guide covers the calibration steps.
Step 9: An adjustable spanner (250mm)
For tap fittings, garden hose connectors, and whenever you don’t have the exact-size socket. Bahco is the gold standard but cheap ones work for occasional use. 250mm covers most domestic fittings. Don’t crank too hard on chrome tapware — the jaws will mark the finish. Wrap the jaws in masking tape for visible fittings.
Step 10: A handsaw — 550mm with hardpoint teeth
For cutting timber, plasterboard, and small jobs where pulling out the circular saw is overkill. Hardpoint teeth (factory-sharpened, throwaway) are fine for a household saw. Spear & Jackson, Bahco, or Irwin. The why on hardpoint: the teeth are induction-hardened and you can’t resharpen them, but they stay sharp for years of light use. Once they go blunt, you bin the saw and buy a new one for $30.
Bonus tools that round out the kit
Digital multimeter ($25) — Tests batteries, checks if a power point is live (use the prongs, don’t touch the wires), confirms a fuse is blown. The cheap $25 ones from Jaycar are perfectly adequate for household use. This doesn’t authorise you to do fixed-wiring work — that’s still licensed-only in Australia under AS/NZS 3000.
Torch and headlamp with USB charging ($40) — For under-sink work, in roof spaces, and during outages. A USB-rechargeable headlamp keeps both hands free — once you’ve worked under a sink with a torch in your mouth, you’ll never go back. $40 spent here pays back the first time the power’s out.
What I’d add later (in order)
- An impact driver — lighter, more powerful than a drill for screws, about $150 if you’re already in a battery system
- A jigsaw — curved cuts in timber, plasterboard, plastic; $100 for an Ozito
- A circular saw — straight cuts in timber, sheet goods; $150 minimum, Makita is the workhorse
- A set of holesaws — round holes in timber and plasterboard for cable runs; $50
- An oscillating multitool — flush cuts, grout removal, scraping. Worth its weight; our choose and use an oscillating multi-tool guide covers picking one
When to call a tradie
A starter kit doesn’t authorise you to do everything. Fixed wiring (anything behind a power point or in a junction box) is licensed-only under AS/NZS 3000 — call a sparky. Anything in the gas line, hot water service plumbing, or behind a tap is licensed plumber work in most Aussie states. The multimeter is for testing, not for doing. The starter kit gets you across hanging shelves, fixing doors, building flat-pack, patching plasterboard, mounting TVs — not rewiring the kitchen.
Common screw-ups
- Buying the 200-piece mega-set instead of 12 quality tools — 80% sits unused, 20% breaks
- Using the wrong screwdriver size (PH1 in a PH2 head) — strips the head every time
- No stud finder, so every shelf is a guess and you patch three holes per install
- Cheap plastic pliers that bend at the pivot on the first tough job
- Storing tools in a damp garage with no oil — rust ruins decent kit in 12 months
Cost & time
Twelve real tools total about $500–700 buying mid-tier Aussie brands (Stanley, Bahco, Ozito for power, Makita if you can stretch). Spread the spend over a few months. Mega-sets at $299 look cheaper on day one but you’ll definately re-buy half of it within two years.
Wrap-up
Buy good, buy once, mate. Twelve real tools beat a hundred plastic-handle mystery tools every day of the week. My handyman tool kit at home is essentially the list above plus the “what I’d add later” set — about $1,500 in total, accumulated over years, still going strong after a decade-plus of weekly use. Skip the mega-set, build slowly, and in five years you’ll have a kit that does everything. Easy as.