How to Test, Maintain and Replace Battery Smoke Alarms in Australia
I’ll never forget walking into a rental in Mitcham at the end of last winter to do a switchboard tag. The smoke alarm in the hallway had been chirping for six weeks and the tenant had — I am not making this up — taped a tea towel over it so they couldn’t hear it. The alarm was a 2009 ionisation unit, 17 years old, three full service lives past its expiry date. The 9V battery was deader than disco. The smoke chamber was packed with cobwebs and what looked like a mummified moth. I changed it out for a Brooks photoelectric with a 10-year sealed lithium battery, charged the landlord $89 for the unit, and got a story I tell every time someone asks me about alarms. So here’s the deal: testing and replacing a battery-only alarm is legal DIY in every state. Hardwired 240V alarms are mine. Don’t cross the line and we’ll all sleep better — literally.
What you’ll need
- An AS 3786 photoelectric smoke alarm — Brooks, Quell or Cavius are the three I trust
- A 9V lithium battery (Energizer Ultimate Lithium or Duracell Ultra) — or a 10-year sealed lithium unit, which I recommend
- A small Phillips screwdriver
- A vacuum cleaner with a soft brush attachment
- A step ladder you trust — not a wobbly dining chair
- A torch
- A can of smoke aerosol (Quell or Brooks make them, about $15 at any wholesaler)
- A Sharpie for writing the install date on the alarm
Step 1: Identify which alarm you have — battery-only or hardwired
Twist your alarm a quarter-turn anti-clockwise and pull it down. If two or three thin wires (red, black, sometimes white) come down with a plug-in connector, that’s a hardwired 240V alarm. Stop. Push it back up. Call a sparky. If there’s no wires — just a battery sitting in a tray — that’s battery-only and the rest of this article is yours. Don’t disconnect a hardwired unit thinking you’ll “just swap the base” — the moment you separate the connector, you’ve performed notifiable electrical work under AS/NZS 3000.
Step 2: Check your state’s compliance rules
State requirements as of 2026: QLD since 1 January 2022 requires AS 3786 photoelectric in every bedroom, hallway and storey, interconnected (wireless or wired) and hardwired for new builds and post-2017 sales. Battery-only 10-year sealed lithium allowed in existing dwellings until 1 January 2027. VIC requires AS 3786 photoelectric in every dwelling, replaced every 10 years; new builds hardwired interconnected. NSW has required AS 3786 photoelectric since 2006 with annual checks on rentals. SA, WA, TAS, ACT, NT all require AS 3786 photoelectric, with placement and interconnection rules varying. Ionisation alarms (the older type with a trefoil radiation symbol) are no longer compliant for new installs anywhere and are specifically banned in QLD and VIC. If you see that symbol, replace immediately.
Step 3: Test the alarm every month
Press and hold the test button for 5 seconds. The alarm should sound a continuous loud horn — usually 85 dB at 3 m. Release and it should stop within 10 seconds. If it doesn’t sound, sounds weak, or won’t stop, replace the battery and retest. If still faulty, replace the unit. The test button only confirms the horn and electronics work; it doesn’t confirm the smoke chamber is clear, which is where the smoke aerosol comes in. Stick a sticker on the inside of the laundry door with the monthly test date.
Step 4: Smoke-aerosol test every six months
Spray the smoke aerosol from about 30 cm below the alarm in a one-second burst. The alarm should sound within 20 seconds. If it doesn’t, the smoke chamber is either dust-clogged or the sensor is dud. Try Step 5 (clean) first, then if still no joy, replace the unit. This is the test that actually proves the alarm will detect a real fire — not just the test button. AS 3786 service life is 10 years but the sensor degrades gradually, and the smoke test is the only way to catch that.
Step 5: Vacuum the alarm every six months
Dust, cobwebs and dead insects in the smoke chamber are the number-one cause of false alarms (the dreaded 3am chirp) and the number-two cause of failed-to-detect events. Take the alarm down, use the vacuum’s soft brush attachment, and gently brush around the slots in the housing. Don’t poke anything inside — you’ll damage the sensor. Wipe the outside with a dry cloth only. No chemicals, no wet cloth — chemicals contaminate the sensor for months. Insect spray near alarms is also a slow killer because the residue cakes on the sensor.
Step 6: Replace the 9V battery annually or on first chirp
If the alarm chirps once every 30–60 seconds, the battery is low. Replace it. Use a 9V lithium — alkalines lose voltage as they discharge while lithiums hold voltage and then drop off a cliff, which is exactly what the chirp circuit is calibrated for. Better still: when the alarm itself is due for replacement, get a 10-year sealed lithium unit like the Brooks i9-10 or Quell Q1300. The battery is sealed inside the alarm and lasts the full 10-year service life. No more annual battery swaps, no 3am chirp, no tea towel.
Step 7: Check the manufacture date on the back
Every AS 3786 alarm has a manufacture date stamped on the back. Service life is 10 years from manufacture, not from install. If yours is older than 10 years, replace it. The photoelectric sensor degrades and you cannot trust it, even if it tests fine on the button. I definately see 2008 alarms still on ceilings every month. They are dead, they will not save anyone. While you’re checking, also test your safety switch — see how to reset a tripped safety switch for the routine.
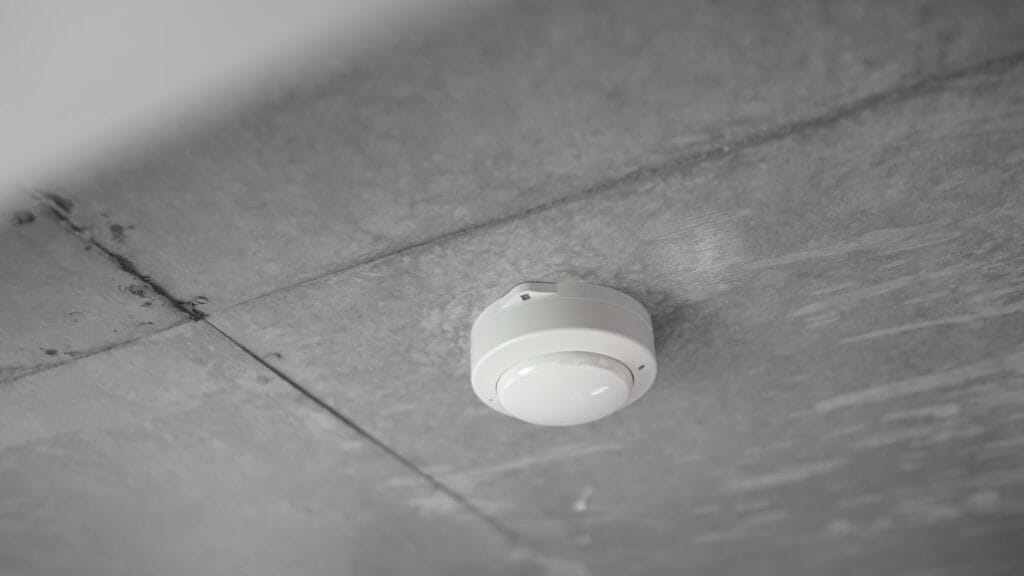
Step 8: Replace a battery-only alarm
Twist the old alarm off the ceiling base (quarter-turn anti-clockwise on most). The base usually unscrews from the ceiling with two Phillips screws into a stud or a plasterboard anchor. Check the new alarm’s base mounts to the same screw spacing — Brooks, Quell and Cavius all use slightly different patterns, so plan to re-drill if you’re switching brands. Mount the new base, drop in the battery (or peel the activation tab on a sealed 10-year unit), and twist the new alarm onto the base. Press the test button. Continuous horn = job done.
Step 9: Placement matters under AS 3786
Placement rules: at least 300 mm from any wall or corner, at least 300 mm from a light fitting or ceiling fan, and not within 1.5 m of an air-con vent or bathroom doorway (steam triggers false alarms). On a sloped ceiling, mount within 500 mm of the apex. In a hallway, mount centrally. In a bedroom, mount centrally on the ceiling — not above the bed (smoke pools at the highest point first, not directly above where you sleep). If your existing alarm is in a bad spot, this is the time to move it.
Step 10: Interconnection and logging your install date
Interconnected alarms all sound when one detects smoke. QLD requires this in all bedrooms and hallways. Wireless interconnect is what most people retrofit because it doesn’t need a sparky — Brooks i9-10 and Quell Q1300 both have wireless interconnect modes and pair via a button-press sequence. Read the manual; pairing is fiddly the first time. Once paired, trigger one alarm with smoke aerosol — every paired alarm should sound within 20 seconds. Hardwired interconnection (more reliable, no batteries) is a sparky job under AS/NZS 3000. Lastly: write the install date on the alarm casing with a Sharpie. In 10 years’ time you (or the next owner) will know exactly when its due for replacement.
When to call a tradie
Anything hardwired. Replacing a 240V hardwired alarm. Adding new alarm wiring. Replacing the base of a hardwired unit. Connecting an interconnect cable between hardwired alarms. All licensed work under AS/NZS 3000. Don’t cross the line — the fine for unlicensed electrical work in SA is up to $25,000, in VIC it’s $40,000 plus criminal charges, and your home insurance will void on any electrical-cause fire if the install isn’t certified. A sparky to swap a hardwired alarm is $90–$140 in Adelaide. Bundled with other work in the same visit it’s often cheaper.
Common screw-ups
- Disconnecting a hardwired unit thinking you’ll swap it for a battery one — instantly illegal, and you’ve voided your insurance.
- Mounting an alarm too close to the kitchen, bathroom or air-con vent — constant false alarms, then someone takes the battery out, then no protection.
- Using cheap alkaline 9V batteries instead of lithium — they don’t have the right discharge curve and the chirp warning is shorter.
- Ignoring the manufacture date because “it tests fine” — the sensor degrades silently after 10 years.
- Spraying insect spray or cleaning chemicals near alarms — residue cakes the sensor and kills detection sensitivity.
Cost & time
Battery-only photoelectric alarm: $35–$60 each at Bunnings; 10-year sealed lithium $50–$80. Smoke aerosol can: $15. Swapping a unit takes about 10 minutes per alarm once you’ve got the ladder up. Hardwired swap by a sparky: $90–$140 each, less per unit if you do multiple in one visit. Full house with 4-6 alarms: budget half a Saturday morning to do them all and update the dates.
Here’s the safe play. Battery-only alarms are yours; hardwired 240V alarms are mine. AS 3786 photoelectric is the only standard you should be buying — ionisation is dead. 10-year sealed lithium units are worth the extra $25 every single time. Test monthly with the button, smoke-aerosol every six months, vacuum every six months, replace the whole unit at 10 years from manufacture date, not install date. Stick to that and you’ll never have a tea-towel-over-the-alarm moment, and more importantly, you’ll wake up if something happens at 2am. Electricity doesn’t care about your weekend plans — but a working smoke alarm does, every night.