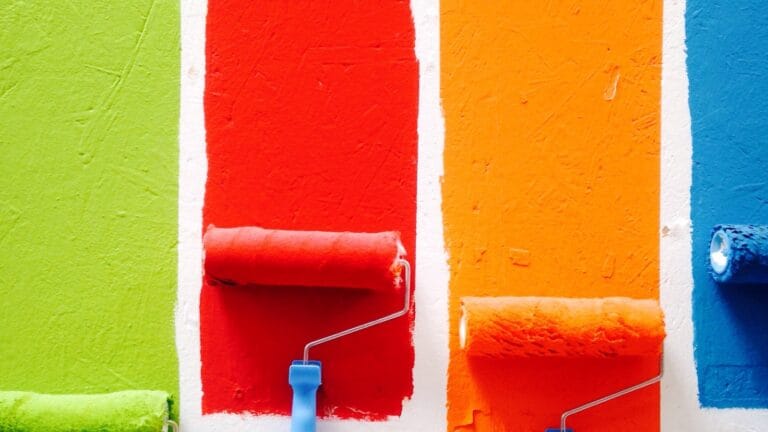
How to Repaint a Room Properly
Last spring I had a client in Northcote who’d watched a TikTok of someone “repainting their lounge in three hours” and decided to do the same before her in-laws arrived. She rang me Sunday afternoon. The walls had bled through, the cornice line wandered like a creek, and you could see every nail hole still poking through the topcoat. We pulled the lot back, washed it down, did the whole thing properly across two days, and it looked like a different room. The lesson I keep telling people: a room is a two-day job. Day one is 80% prep — washing, filling, sanding, taping, priming. Day two is the actual rolling. Anyone telling you a lounge repaints in an afternoon is selling you a finish that flakes around the architraves by Easter.
I’ve done a few of these now — somewhere north of two thousand rooms across Melbourne over fifteen years — and the prep-to-paint ratio is roughly 4:1. For every hour of rolling there’s four hours of getting the wall ready to take paint properly. Skip that ratio and the paint can’t save you. Here’s how we do it.
What you’ll need
- 10L premium-quality wall paint — Dulux Wash & Wear is my default, Taubmans Endure is the close second. Don’t go cheap; Bristol’s budget acrylic looks great for six months then chalks.
- 4L matching ceiling paint if you’re doing the ceiling (Dulux Wash & Wear Ceiling Flat)
- 2L low-sheen acrylic primer/sealer for patches and stains
- A 270 mm cage roller frame with a 10–12 mm microfibre sleeve
- A 65 mm angled cutting-in brush — Purdy XL Glide or Oldfields Pro Series. A $35 brush will outlast ten cheap ones.
- Frog Tape multi-surface (the yellow one) — its acrylic edge actually seals to the wall
- Canvas drop sheets — never plastic, plastic dries paint into a slip hazard
- 120 and 240 grit sandpaper plus a sanding block
- Selleys Spakfilla Rapid and a 50 mm putty knife
- A bucket of warm soapy water, sugar soap, and a stack of microfibre rags
Step 1: Empty the room properly

Everything out. Or to the centre and tarped. Take the curtains down, pop the switch and outlet plates off (one Phillips screw each — bag them, label them), unhook artwork. The more you clear, the sharper the result, and you’ll be amazed how much faster you move without dancing around the couch. My kelpie Toby once knocked a roller tray off a half-cleared coffee table at a Brunswick job — half a litre of Wash & Wear into the rug. I clear the room now.
Step 2: Wash the walls with sugar soap
Selleys Sugar Soap and a damp sponge, top to bottom on every wall. Kitchens and hallways carry a thin film of cooking grease, body oil and dust that paint absolutely will not bond to. Skip this step and your beautiful new topcoat starts lifting around the light switches within a year. Rinse with clean water, let it dry properly — at least 30 minutes in warm weather, longer in a Melbourne June. Your finger drag should leave no streak when its dry.
Step 3: Fill, sand, dust
Every nail hole, screw hole, dent, crack and door-knob ding gets a press of Spakfilla. Slight overfill so it sands flush. Wait the time on the tub — usually 30 minutes for Rapid, longer for standard — then sand smooth with 240-grit. Wipe the dust off with a barely-damp cloth. Heres where most people go wrong: they dont fill the tiny dings because they cant see them straight on, but raking light at 7pm will spotlight every one. Fill what you cant see now and your finished wall reads bought-in.
Step 4: Tape architraves, skirting, and the ceiling line
Frog Tape Yellow along the top of every skirting, around door and window architraves, and along the wall-meets-ceiling line if your cornice is staying a different colour. Press the edge down hard with the putty knife — that’s how you get a knife-sharp paint line instead of a fuzzy bleed. Two minutes of taping saves an hour of touch-up later. For more on the cut-in technique that lets you skip tape on cornices entirely, see our guide to cutting in paint edges.
Step 5: Prime any patches and stained areas
Anywhere you’ve filled, plus any water stains, marker pen, smoke residue or that brown ghost-mark behind where the bookcase used to live — hit each one with a stain-blocking primer. Bare filler absorbs paint differently to primed wall and you’ll see the patch flash through two coats of topcoat. Trust me on this. Spot-priming costs you 20 minutes and saves you a third topcoat. For going light over dark feature walls or stained areas, check our painting over dark walls method.
Step 6: Cut in first — the 50 mm border around everything
Load the angled brush properly: dip about a third of the bristle into paint, tap (not wipe) on the kettle edge. Paint a 50–70 mm band along the ceiling line, around architraves, around skirtings, around switches. This is the band the roller can’t reach without clouting trim, and its where a great finish separates from a good one. Confident wrist, long smooth strokes. Don’t dab — drag. And don’t over-load — a brush that drips is one that streaks.
Step 7: Roll while the cut-in is still wet
Get rolling within ten minutes of finishing the cut-in. If the cut-in dries before you roll, you get a “picture frame” effect where the brushed and rolled paint sit at slightly different sheens — and that frame is visible forever in raking light. Wet-on-wet, every time. If you’ve taken too long, dampen the cut-in line with a misted spray bottle and roll quickly. Better to plan it so you don’t have to.
Step 8: Roll in W-shapes, then back-roll
Load the roller properly: full sleeve coverage, but not dripping. Roll up the tray slope a few times to spread the paint through the nap. Lay down a big W across a 1 m square on the wall — slow, controlled, not a panic-stroke. Then fill the W with parallel passes, and finish with a single light pass top-to-bottom (the “lay-off”) to even the layer. Don’t press hard. Gentle pressure, let the roller do the work. Move to the next square overlapping the wet edge of the first by 10 cm. Splatter happens when the roller spins faster than the paint can release — slow strokes, no splatter. Definately slow, even when your in a hurry.
Step 9: Wait the full recoat time — even if it feels dry
Wash & Wear wants 2 hours minimum recoat at 25°C; in a cold Melbourne winter or a humid Brisbane summer, give it 4. Touch-dry isn’t recoat-dry. Go on too soon and the second coat lifts the first — you’ll get streaks and ghosted roller marks that no further coat will hide. Read the can. Have a cuppa. The wall doesn’t care if your impatient.
Step 10: Second coat, then pull tape while paint is still slightly tacky
Same process for coat two: cut in, roll the W, fill, lay off. Work the same direction so the roller texture matches across both coats. Once the second coat is on but still slightly tacky — not wet, not fully dry — pull the painters tape slowly at a 45° angle, back on itself. Pulling tape after the paint has fully cured peels paint off with it; pulling while wet smears the line. Just-tacky is the sweet spot, usually 20–40 minutes after rolling. Slow pull, smooth angle, lovely finish. The same rule applies for trim — see our painting trim and skirting guide for the full enamel routine.
When to call a tradie
Most rooms are well within homeowner DIY. But there are jobs where surface prep is genuinely beyond a Saturday painter. If the existing paint is pre-1970 and flaking, you’re potentially dealing with lead — and sanding it without containment is a real health risk for the kids in the house. Get a lead test ($15 swab from Bunnings) and if positive, call a professional. Same for any wall containing fibre-cement or asbestos sheet (common in Aussie homes built 1940s–80s) — never sand it, ever. And big render or plasterboard repairs — anything bigger than a dinner plate — need real plastering skill before paint goes anywhere near them. For everything else, the AS 2311 painting-of-buildings standard is the playbook we work to.
Common screw-ups
- Skipping the wash. Paint won’t bond to grease. The wall looks fine for six months then peels around switches. Sugar soap is $7 and saves you the redo.
- Painting from the tin. Dipping a brush into a 10 L tin contaminates the lot. Always pour into a kettle or tray.
- Letting the cut-in dry before rolling. Picture-frame sheen mismatch every time. Cut in one wall, roll it, then move to the next wall.
- Cheap roller covers. A $4 supermarket cover sheds fluff into the paint and leaves visible nap marks. Spend $12 on an Oldfields or Uni-Pro microfibre.
- Pulling tape after the paint has cured. It peels paint off in strips. Pull while just-tacky, slowly, at 45°.
Cost & time
Budget around $180–$280 for an average 14 m² lounge using premium paints (10 L wall, 4 L ceiling, primer, brushes, roller, tape, drop sheets if you don’t already own them). Time-wise: a full day for prep (4–6 hours), and a second day for two coats with the recoat wait between (5–7 hours total, much of it waiting). A weekend gets it done well; a Sunday afternoon does not. Allow another half-day if you’re doing the cornice and trim in a different colour.
The Jen rule — wrap
Spend day one prepping. Wash, fill, sand, tape, prime. Day two paints itself. Every botched paint job I’ve ever been called in to fix comes from skipping prep. The paint can’t fix what wasn’t fixed first. Take your time on the boring bits and the fun bit at the end actually is fun — rolling smooth, even coats onto a properly prepared wall is one of the most satisfying jobs in this trade. And if you do find yourself with a tricky surface — limewash, micro-cement, a deep feature wall on textured plaster — flick us through the brief. We love a complicated job. Just dont rush it. Patience is what gives you the finish you actually want.